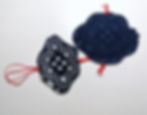
Chinese New Year Ornaments
- Sew, Jahit
- Jan 28, 2021
- 3 min read
Updated: Jan 16, 2024
Whip up this quick and easy ornament that fits right in with the rest of your Chinese New Year decorations!

MATERIALS
I have used this traditional Chinese indigo-dyed cloth (a form of Chinese batik) leftover from my Chinese New Year table runner project. It had these infinity knot motifs all over. It was these motifs that I used as the shape of my ornaments. You can of course use any woven fabric you like. If your fabric does not have specific motifs to cut out, you could just decide on any shape ornaments you want!
For the tassels, I have made my own. You could purchase ready-made tassels from craft stores or online shopping platforms. If you are reading this from Malaysia, Shopee and Lazada have plenty for sale in various colours and lengths. This being a last minute project for me, I just wasn't keen on the wait for shipping, so I made my own. Here's an excellent tutorial by Robert Mahar on how to make your own tassels.
I have also used the same red strings I used in my tassels for the connectors and the loop. You could also use red ribbons, bias binding or even lace!

Materials Used in this Project.
I didn't actually end up using any of those ribbons.
To check out what other things you can sew for the Chinese New Year, see this post.
STEP 1:
CUT OUT SHAPES
Trace the shape of your motif to create a template using a piece of card.

Using the template, cut out front and back pieces. You will need 3 pairs.

STEP 2:
PREPARE LOOP, CONNECTORS & TASSEL
Prepare a loop, two connectors and your tassel. The connectors should be knotted at both ends, while the loop and tassel should be knotted where they will be sewn to an ornament piece. These knots keep the connectors firmly attached to the ornament pieces after sewing.
My connectors ended up looking too long after I have sewn everything together, so I created a knot in the mid section of each connector to shorten it. It turned out looking great, so I'd recommend you create this third mid-section knot on purpose as a design element before you sew it all together. It was a pain trying to knot them after they've been sewn together.


Recommended to Create A Third Knot at the Mid-Section for Aesthetics
STEP 3:
SEW TOP PIECE WITH LOOP AND FIRST CONNECTOR
STEP 3.1: Start with a pair of front and back pieces, your loop and the 1st connector.

STEP 3.2: Place loop upside down on the right side of the back piece.

STEP 3.3: Place front piece on top, right sides together, sandwiching the loop.

STEP 3.4: Sew loop in place.

STEP 3.5: Flip front piece up and place 1st connector on the right side of back piece.

STEP 3.6: Flip front piece back down to sandwich the 1st connector, and sew it in place.

STEP 3.7: Sew all around.

STEP 3.8: Cut a slit on the BACK piece.

STEP 3.9: Turn inside out.

STEP 4:
SEW MIDDLE PIECE TO FIRST CONNECTOR AND SECOND CONNECTOR
STEP 4.1: Sandwich the 1st connector between a second pair of front and back piece.

STEP 4.2: Sew 1st connector in place.

STEP 4.3: Flip the front piece down.

STEP 4.4: Swipe Top Piece to one side and place the 2nd connector on the right side of the back piece.

STEP 4.5: Flip the front piece back up to sandwich the 2nd connector.

STEP 4.6: Sew 2nd connector in place.

STEP 4.7: There is no way to sew around the Middle Piece with the bulk of the Top Piece stuffed between the sandwich. So, we will at this point cut a slit on the BACK piece to pull the Top Piece and both connectors out through the slit.

STEP 4.8: Sew around the Middle Piece by swiping the Top Piece and connectors out of the way as you sew.

STEP 4.9: Turn Middle Piece inside out.

STEP 5:
SEW BOTTOM PIECE TO SECOND CONNECTOR AND TASSEL
STEP 5.1: Sandwich the 2nd connector between a last pair of front and back piece.

STEP 5.2: Sew 2nd connector in place.

STEP 5.3: Flip the front piece down and swipe the Top and Middle Pieces to one side.

STEP 5.4: Place the tassel on the right side of the back piece.

STEP 5.5: Flip the front piece back up to sandwich the tassel.

STEP 5.6: Sew tassel in place.

STEP 5.7: There is no way to sew around the Bottom Piece with all that bulk stuffed between the sandwich. So, we will at this point cut a slit on the BACK piece to pull the Top Piece, Middle Piece and tassel out through the slit.

STEP 5.8: Sew around the Bottom Piece by swiping the Top Piece, Middle Piece and tassel out of the way as you sew.

STEP 5.9: Turn Bottom Piece inside out.

STEP 6:
FILL PIECES WITH POLYFIBER & HAND-STITCH CLOSE


DONE!


